Materials Needed:
- Super glue
- JB Weld
- Q-tips (to wipe away excess JB Weld on areas that will be visible)
- Hand drill or Dremel tool with drill bits
- Drill
- Pinning material
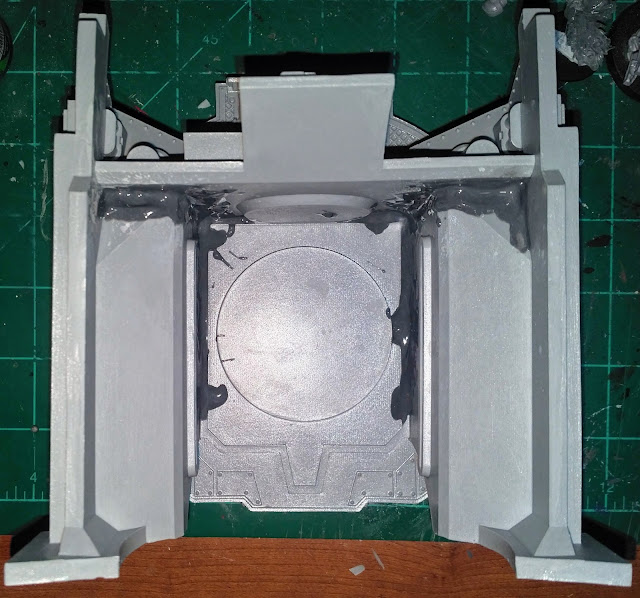
Step 1: Take the torso base plate, lower side wells, front plate and rear access hatch plate and dry fit them, using clamps to hold them in place once in position. Once you have these plates positioned, use a small amount of super glue on strategic corners and joins in order to "tack weld" these pieces into place. Once the glue has set and the pieces are in place, use JB Weld along all of the seams in the torso box to bond them together. However, do not bond the front plate at this stage.
It is hard to see in the pictures, but super glue was applied at the corners and a few seams designed to keep the torso box from sliding at the JB Weld was applied. Choose only a small handful of spots to do this as the JB Weld needs as much surface to grip as you can get.
The lower sides and rear hatch are now bonded. Remember, do not do the front plate yet. as it would interfere with the alignment of other parts unless they don't need to be reheated.
Step 2: Apply super glue to the upper rear torso panels to take them into place and then apply JB Weld to the seam and the lower rear panel
Step 3: Apply JB Weld to the seams for the upper side walls and the front plate and assemble them. Use clamps to ensure that the parts are snug while setting and place the top carapace on while setting to help ensure the proper angles of the parts. DO NOT glue the top carapace on at this stage.
The clamps and top carapace ensure that the box will set at the correct angles.
It might seem like a lot of JB Weld, but this ensures a strong bond and you want to maximize the surfaces coated in it to make sure you have no weak points. This is not a "less is more" situation, especially since you won't see these parts once finished.
Step 4: Mark the location of where you expect to place pins for the Warlord's shoulders, drill the shoulder and place the pins. Then, press the shoulder against the torso to make marks in the torso and drill at those locations. Score the two parts using cross-hatching and then apply JB Weld and the pins. The pins and bonding agent should keep the parts in place, but the application of super glue at a few locations will allow you to tack weld the parts in place while the JB Weld cures. Cover the pins in JB Weld as well since this will actually run the bonding agent through the holes as well, providing even greater strength of the bond.
Step 5: Drill the hole into the top of the waist using a forstner bit for a magnet if desired and create bleed out holes, as well as smaller holes inside of the larger hole to give the JB Weld depth for the bond. Once cured, place JB Weld in the center of the torso box's bottom and apply the other torso magnet. The same process can be done for the Warlord's neck and head.
Step 5: Glue the carapace and upper head cowling into place. Super glue can be used on the upper head cowling if desired. Phase I of the torso is now complete.
Step 5: Drill the hole into the top of the waist using a forstner bit for a magnet if desired and create bleed out holes, as well as smaller holes inside of the larger hole to give the JB Weld depth for the bond. Once cured, place JB Weld in the center of the torso box's bottom and apply the other torso magnet. The same process can be done for the Warlord's neck and head.
These smaller holes will allow the JB Weld a place to seep, causing a "root" to develop and provide extra bonding strength. Very good when you're using 33 pound (15 kilogram) pull magnets.
The magnet in the torso box just sits in place on top of the JB Weld. Once the leg magnet is applied, just slap the JB Weld on this point and then plop the magnet in the torso box. The magnetic force will align them.
Step 5: Glue the carapace and upper head cowling into place. Super glue can be used on the upper head cowling if desired. Phase I of the torso is now complete.


Any ideas on how to keep the torso stable and accessible? I have some conversion ideas that require me to have access to the inside on occasion.
ReplyDeleteThe only way I can think of is to leave the top carapace freed up, but I don't think it's worth the risk to be honest. Once you glue down the carapace that torso box is very structurally sound and ensures that the arms have an extremely solid base to work from.
Delete